
How Can You Tell If Your Attic Is Under-Insulated?
Your heating bills keep climbing, your upstairs rooms feel colder than they should, and you noticed ice forming along your roofline after the last snowfall. These aren't separate problems — they're all pointing to the same culprit hiding above your ceiling.
Most homes built before 1990 in northern states have less than half the insulation they actually need, and the consequences go far beyond comfort. Under-insulated attics waste thousands in heating costs, create ice dams that damage roofs, and make your HVAC system work overtime just to keep up.
The good news? Identifying the signs is straightforward, and fixing the problem delivers immediate benefits you can measure on your next utility bill.
Which Description Matches Your Situation?
🧊 The Ice Dam Victim
You've got icicles the size of baseball bats hanging from your gutters, water stains appearing on your ceiling, or you're dealing with active leaks after snow.
Your priority: Understanding why ice dams keep forming and how insulation prevents them from coming back.
💸 The Budget Investigator
Your heating bills jumped 30% in two years, your furnace runs constantly in January, and you're wondering if there's a problem you can actually fix.
Your priority: Confirming whether poor insulation is draining your wallet and what upgrading actually costs versus saves.
🏠 The Comfort Seeker
Some rooms feel Arctic while others are fine, your second floor is drafty no matter what the thermostat says, and you're tired of wearing sweaters indoors.
Your priority: Figuring out if insulation is creating those temperature swings and whether fixing it will actually make a difference.
7 Clear Signs Your Attic Is Under-Insulated
Your home tells you when insulation is failing. The challenge is recognizing the signals before they turn into expensive damage.
1. Ice Dams Form After Every Snowfall
When heat escapes through your attic, it warms the roof deck and melts snow from underneath. That meltwater runs down to the cold eaves, refreezes, and builds up into ice dams. This isn't just a winter inconvenience — it's a direct measurement of how much expensive heat you're pumping into the outdoor air.
If you see thick ice ridges along your roofline or water stains on your ceilings after snow, your attic insulation is failing its primary job. Learn more about the connection in our guide on preparing your roof for winter.
🚩 Critical Warning: If you have active ice dams causing leaks, adding insulation alone won't stop water from entering right now. You need professional ice dam removal first to prevent immediate damage, then insulation upgrades to prevent future dams.
2. Your Heating Bills Keep Rising
Compare last January's gas or oil bill to three years ago. If it jumped 25% or more without rate increases explaining it, you're likely heating the outdoors through your roof. Under-insulated attics can account for 30-40% of total heat loss in northern homes.
The math is straightforward: if you're spending $300/month on heating and half that heat escapes through the attic, you're throwing away $1,800 per winter season. Every season. Until you fix the insulation.
3. Uneven Temperatures Between Rooms
When one bedroom feels like a freezer while another is comfortable, the problem often isn't your furnace — it's inconsistent or compressed insulation in different attic zones. Older homes especially show this pattern where contractors added insulation over the years without ensuring uniform coverage.
Walk through your upstairs rooms on a cold morning. If temperature differences exceed 5 degrees, your attic insulation is spotty at best.
4. Your Attic Feels Warm in Winter
This surprises homeowners, but your attic should feel almost as cold as the outdoor temperature during winter. If you can stand in your attic comfortably without a coat when it's 15°F outside, that warmth represents heat escaping from your living space.
Proper insulation creates a thermal barrier that keeps heat below the ceiling. A warm attic means that barrier has failed.
💡 Pro Tip: Check your attic on a winter morning before the sun warms the roof. Bring a thermometer and compare the attic temperature to outdoor temp. They should be within 10 degrees of each other if insulation is doing its job.
5. Visible Gaps or Compressed Insulation
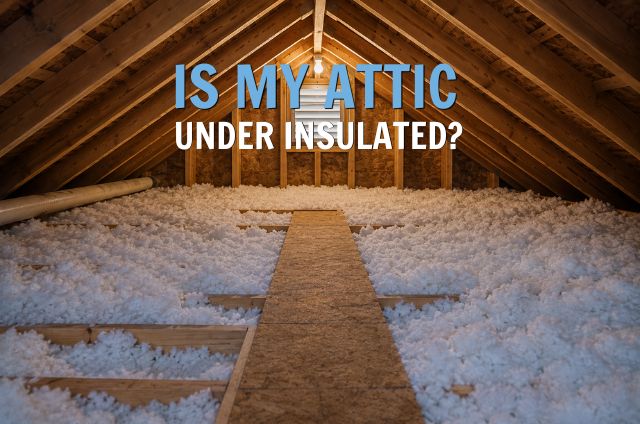
If you can see ceiling joists poking above the insulation level, you don't have enough. Northern climates need 12-15 inches of fiberglass or cellulose insulation covering every joist completely. Anything less is costing you money.
Also watch for compressed batts — if someone walked on the insulation or stored boxes on it, those compressed areas lose 50% or more of their insulating value. Insulation works by trapping air. Compress it, and you eliminate those air pockets.
6. Your Furnace Runs Constantly
A properly insulated home allows your furnace to cycle on and off normally. If yours runs almost continuously on cold days and the house still feels chilly, it's fighting a losing battle against heat escaping through the attic.
This isn't just uncomfortable — it shortens your furnace's lifespan and spikes your energy bills. You're burning fuel to heat the neighborhood instead of your home.
7. Your Home Was Built Before 1990
Building codes evolved significantly over the past 30 years. Homes built in the 1970s and 1980s typically have R-19 to R-30 insulation in attics. Current code requires R-49 to R-60 in northern states — meaning older homes need double or triple their original insulation to meet modern standards.
Age alone doesn't guarantee a problem, but if your home predates 1990 and you've never upgraded insulation, you almost certainly need more.
How to Check Your Attic Insulation Level Yourself
You don't need a contractor to determine if your insulation is inadequate. A 15-minute inspection tells you everything you need to know.
Simple DIY Inspection Process
- Measure the depth — Use a ruler or tape measure to check insulation depth in multiple spots, especially near exterior walls and in the center. Write down the measurements.
- Check for gaps — Can you see ceiling joists? Are there bare spots around chimneys, vents, or recessed lights? Those gaps leak heat like open windows.
- Look for compression — Has anyone walked on the insulation or stored items on it? Compressed insulation doesn't insulate.
- Identify the type — Pink/yellow batts = fiberglass. Loose gray material = cellulose. Yellowish foam = spray foam. Different types have different R-values per inch.
- Calculate R-value — Fiberglass batts: R-2.9 to R-3.8 per inch. Cellulose: R-3.1 to R-3.7 per inch. Spray foam: R-6 to R-7 per inch. Multiply depth × R-value per inch.
If your calculation comes out below R-49, you need more insulation. If you measured 8 inches of fiberglass, for example, you have roughly R-27 — less than half what northern homes require.
⚠️ Safety Note: Wear a dust mask, long sleeves, and gloves when inspecting fiberglass insulation. Don't step between joists — you'll fall through the ceiling. Walk only on joists or use boards to distribute your weight. If you're not comfortable in attics, hire a professional for the inspection.
What Under-Insulation Actually Costs You
The real expense isn't the insulation upgrade — it's what you lose every winter by not upgrading.
↑ What Pushes Costs Up
- Heating bills: $1,500-$3,000 annually in wasted energy
- Ice dam damage: $5,000-$15,000 per incident for roof and interior repairs
- HVAC strain: Premature furnace replacement ($4,000-$8,000) from overwork
- Moisture damage: Mold remediation and ceiling replacement if leaks occur
- Resale value: Homes with energy issues sell for less and take longer to move
↓ What Reduces Costs
- Energy rebates: Many utilities offer $500-$1,500 for insulation upgrades
- Federal tax credits: Up to 30% of material costs through energy efficiency programs
- Quick ROI: Proper insulation pays for itself in 3-5 years through bill reductions
- DIY options: Blown cellulose can be rented and installed by handy homeowners
- Prevent ice dams: Avoid $500-$2,500 annual steam removal costs
A typical attic insulation upgrade costs $2,000-$5,000 depending on square footage and current levels. If that prevents just one ice dam removal ($1,200 average) and cuts your heating bill by $800/year, you break even in under three years — then enjoy savings for the next 30+ years.
Current Insulation Standards for Northern Climates
Building codes changed because the old standards didn't work. Here's what northern snow-belt states actually require now versus what most older homes have.
Old Standard (Pre-1990)
What most homes have
- ❌ R-19 to R-30 attic insulation
- ❌ 6-10 inches fiberglass batts
- ❌ Gaps around penetrations
- ❌ No air sealing requirements
- ❌ Results in ice dams and high bills
Current Code
Minimum requirement
- ✓ R-49 minimum attic insulation
- ✓ 14-16 inches fiberglass/cellulose
- ✓ Continuous coverage
- ✓ Basic air sealing
- ✓ Meets minimum energy standards
Best Practice
Optimal for ice dam prevention
- ✓ R-60 attic insulation
- ✓ 18-20 inches blown cellulose
- ✓ Complete air sealing first
- ✓ Proper ventilation maintained
- ✓ Eliminates ice dams and maximizes savings
The difference between code minimum (R-49) and best practice (R-60) costs about $500 more in materials but delivers measurably better ice dam prevention. If you're already upgrading, go to R-60 and solve the problem permanently.
Your Options for Upgrading Attic Insulation
Adding insulation isn't complicated, but the method matters. Here's what actually works in northern climates.
Blown Cellulose (Most Common Choice)
Best for: Adding insulation over existing batts or filling attics with irregular joist spacing. Cellulose fills gaps that batts can't reach and settles into a continuous thermal blanket.
Cost: $1.50-$2.50 per square foot installed. DIY materials run $0.60-$1.00 per square foot plus equipment rental.
Pros: Excellent coverage, settles into small gaps, fire-resistant, eco-friendly (made from recycled paper), can be DIY with rented equipment.
Cons: Can settle over time (add 10% extra depth to compensate), creates dust during installation, requires proper air sealing first.
Fiberglass Batts (Affordable DIY Option)
Best for: Attics with standard joist spacing and minimal obstacles. Works well if you're comfortable working in tight spaces.
Cost: $0.40-$1.00 per square foot for materials. Most homeowners DIY to save installation costs.
Pros: Lowest material cost, easy to handle, widely available, can layer over existing insulation.
Cons: Leaves gaps around obstacles, compresses if walked on, irritating to skin and lungs during installation, requires precise cutting and fitting.
Spray Foam (Premium Solution)
Best for: Unvented attics, cathedral ceilings, or situations where you need maximum R-value in limited space.
Cost: $3.00-$7.00 per square foot installed. Not practical for DIY.
Pros: Highest R-value per inch, air sealing and insulation in one step, never settles or compresses, deters pests.
Cons: Most expensive option, requires professional installation, permanent (can't be removed or adjusted easily), changes attic ventilation requirements.
💡 Pro Tip: Air seal before adding insulation. Caulk around pipes, wires, and penetrations. Seal the attic hatch. Use expanding foam around chimneys (maintaining required clearances). Air sealing stops heat loss that insulation alone can't prevent.
Critical Steps Before Adding Insulation
Dumping insulation into your attic without preparation creates new problems. Follow this sequence or you'll waste money and possibly damage your home.
🚩 Don't Skip These Steps
- Fix roof leaks first — Adding insulation over wet areas traps moisture and creates mold. Repair all roof damage before insulating.
- Ensure proper ventilation — Soffit vents must pull air in, ridge vents must exhaust it out. Blocked ventilation with heavy insulation causes ice dams and rot.
- Install baffles at eaves — Foam or cardboard baffles keep insulation from blocking soffit vents while maintaining airflow.
- Air seal all penetrations — Seal around pipes, wires, recessed lights, and the attic hatch. Insulation slows heat flow; air sealing stops it completely.
- Upgrade recessed lights — Old can lights create fire hazards when buried in insulation. Replace with IC-rated (insulation contact) fixtures or airtight LED housings.
- Mark obstacles — Flag junction boxes, HVAC equipment, and anything you'll need to access later so you can find it under 18 inches of insulation.
When Insulation Won't Solve Your Ice Dam Problem
Insulation prevents most ice dams, but not all. Some situations need additional solutions even after upgrading your attic.
🚩 Complex Rooflines
Multiple valleys, dormers, and intersections create cold spots that form ice regardless of insulation. May need heat cable or metal roofing at eaves.
🚩 Cathedral Ceilings
Limited space between ceiling and roof deck makes achieving R-60 impossible. Requires spray foam and careful ventilation design.
🚩 Bathroom/Kitchen Vents
Vents dumping humid air into the attic (instead of outdoors) create frost and ice dams even with perfect insulation. Must vent outside.
🚩 South-Facing Steep Slopes
Solar gain can melt snow from above even with cold attics. These slopes need additional ice dam prevention strategies.
If your home has these complications, insulation is still critical — but partner it with proper ventilation, air sealing, and possibly architectural solutions designed for your specific roof geometry.
Common Questions About Attic Insulation
How do I know if my attic needs more insulation? +
Check for visible gaps between joists, measure insulation depth (should be 12-15 inches in northern climates), look for uneven ceiling temperatures, and monitor for fluctuating energy bills. Ice dams forming on your roof are also a clear sign that heat is escaping through under-insulated areas.
Why are my heating bills so high in winter? +
High heating bills often stem from inadequate attic insulation allowing warm air to escape through your roof. When your attic lacks proper insulation, your furnace works harder to maintain temperature, driving up costs. In northern climates, this heat loss also melts snow on your roof, creating ice dams that can damage your home.
What R-value insulation do I need in my attic? +
Northern snow-belt states require R-49 to R-60 insulation in attics, which translates to 12-15 inches of fiberglass or cellulose. Homes built before 1980 often have only R-19 to R-30, which is insufficient for modern heating costs and ice dam prevention. For optimal ice dam protection, aim for R-60.
Can under-insulated attics cause ice dams? +
Yes. Under-insulated attics allow heat to escape and warm your roof deck, melting snow that refreezes at the cold eaves. This freeze-thaw cycle creates ice dams that can force water under shingles and into your home. Proper insulation keeps your roof cold and prevents this process from starting.
How much does it cost to add attic insulation? +
Most northern homeowners spend $2,000-$5,000 to properly insulate an average attic, depending on square footage and current insulation levels. Blown cellulose runs $1.50-$2.50 per square foot installed, while DIY materials cost $0.60-$1.00 per square foot. This investment typically pays for itself in 3-5 years through reduced heating costs and prevents expensive ice dam damage.
Can I add insulation over old insulation? +
Yes, as long as the existing insulation is dry and not moldy or damaged. Blown cellulose works particularly well over old fiberglass batts because it fills gaps and creates a continuous thermal blanket. Just ensure you air seal first and maintain proper ventilation at the eaves using baffles.
Should I hire a professional or DIY attic insulation? +
DIY works well for blown cellulose if you're comfortable in attics and rent equipment from home improvement stores. Fiberglass batts are also DIY-friendly. However, hire professionals for spray foam, complex roof geometries, or if your attic has accessibility issues. Professionals also complete air sealing and ventilation properly, which DIYers often miss.
Will adding insulation stop ice dams immediately? +
If you already have active ice dams causing leaks, adding insulation won't stop water from entering right now. You need professional steam removal first to eliminate the immediate dam, then insulation prevents future dams from forming. Insulation is a long-term prevention strategy, not an emergency repair for active leaks.
Not Sure Where to Start?
If you're dealing with ice dams now or want to prevent them next winter, we can help you understand your specific situation. Ice Dam USA serves homeowners across the northern snow belt with professional steam removal and honest guidance on long-term prevention.
We'll assess your roof, explain what's happening, and give you a clear plan — whether that's emergency removal, insulation upgrades, or both. No pressure. No pitch. Just practical advice from people who understand northern winters.
Contact UsAvailable across the northern United States. Check our service areas.
